Guided Cloud Setup
The guided installer can help you provision a hosted AutoMem backend and then configure your selected agents. This page covers the Hosted Cloud path in depth: how each provider flow works, what the installer captures, and how to script the supported options.
Reach it by running the installer and choosing Hosted Cloud at the first prompt:
curl -fsSL get.automem.ai | sh# or, if Node 20.19+ is already installed:npx @verygoodplugins/mcp-automem install? Where should AutoMem run?❯ Hosted Cloud InstaPods or Railway — guided deploy Local Docker Clone AutoMem and start Docker Compose on this machine Existing Endpoint Use an AutoMem URL you already haveChoose Hosted Cloud for always-on memory that follows you across devices and machines. For an on-machine stack instead, see Quick Start → Local Docker and Docker & Local Dev.
Pick a provider
Section titled “Pick a provider”After choosing Hosted Cloud, the installer asks how to stand it up:
? How should we stand up your hosted AutoMem?❯ InstaPods open the setup page — it deploys AutoMem and emails your URL + key Railway (guided) sign in with the railway CLI and create a fresh deployment Other — I already have a URL + key already deployed somewhere; just paste your endpoint + token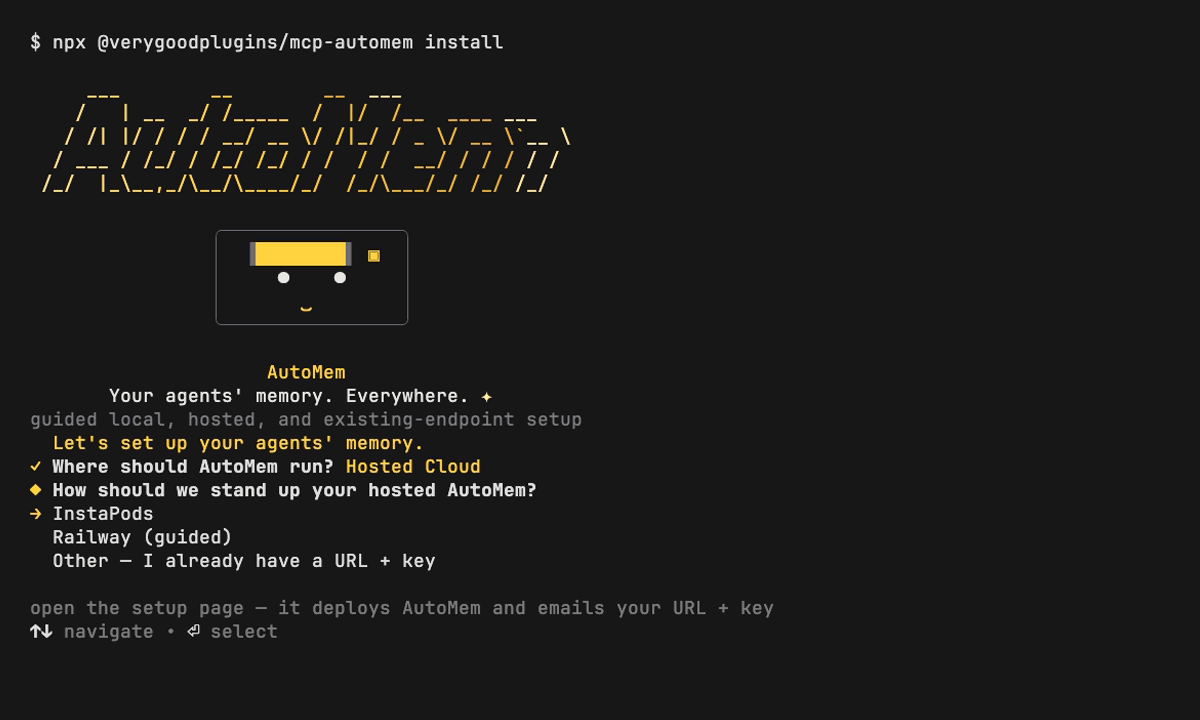
| Provider | How it deploys | Credential flow |
|---|---|---|
| InstaPods | Opens the setup page | Paste the endpoint and key you receive |
| Railway (guided) | Signs in with the railway CLI and creates a fresh AutoMem deployment | The installer reads the endpoint and key after the deployment is available |
| Other | Uses an AutoMem instance you already run | Paste its endpoint and key |
InstaPods
Section titled “InstaPods”- The installer opens the InstaPods AutoMem setup page. Complete the provider setup there.
- Return when you have the API URL and key.
- Paste them at the prompt — the installer does not read InstaPods credentials automatically:
? AutoMem API URL › https://your-automem.instapods.app? AutoMem API key (leave blank if this endpoint does not require one) › ••••••••The installer verifies the endpoint’s /health before touching any agent config.
Railway (guided)
Section titled “Railway (guided)”- The installer uses the
railwayCLI and its authenticated session to create a fresh AutoMem deployment. - It waits for the deployment’s generated domain, reads the AutoMem API token, and verifies the endpoint before it configures agents.
- If the guided flow cannot complete, provide the endpoint and key manually instead.
Existing Railway deployments
Section titled “Existing Railway deployments”Railway (guided) does not discover or reuse an existing Railway deployment in this release. If you already run AutoMem on Railway, choose Other and paste its endpoint and key; that connects the installer without provisioning another deployment.
What the installer captures
Section titled “What the installer captures”Once it has an endpoint, the installer:
- Uses the endpoint + token it read from guided Railway setup or that you pasted for InstaPods/Other.
- Writes them to a
.envin the current directory (AUTOMEM_API_URL, plusAUTOMEM_API_KEYif the endpoint needs one). - Wires your agents — review the plan, approve, and it registers the MCP server for each selected agent, backing up every file it changes with a
.bak.
Nothing is written until you approve the plan, so a cloud run is as safe to preview as a local one.
Customize and script it
Section titled “Customize and script it”Use these supported flags and environment variables to pre-answer the installer:
# Deploy to a hosted provider, fully interactivecurl -fsSL get.automem.ai | AUTOMEM_INSTALL_TARGET=cloud sh
# Pick the provider up frontcurl -fsSL get.automem.ai | \  AUTOMEM_INSTALL_TARGET=cloud \  AUTOMEM_CLOUD_PROVIDER=instapods sh
# I already deployed — capture an endpoint without provisioningcurl -fsSL get.automem.ai | \  AUTOMEM_INSTALL_TARGET=existing \  AUTOMEM_API_URL=https://memory.example \  AUTOMEM_API_KEY=sk-... \  AUTOMEM_YES=1 sh
# Preview the whole plan, write nothingcurl -fsSL get.automem.ai | AUTOMEM_DRY_RUN=1 sh
The same flags work on the npm package, e.g. npx @verygoodplugins/mcp-automem install --target cloud --cloud-provider railway.
| Flag | Environment variable | Purpose |
|---|---|---|
--target | AUTOMEM_INSTALL_TARGET | cloud, local, or existing |
--cloud-provider | AUTOMEM_CLOUD_PROVIDER | instapods, railway, or other |
--endpoint | AUTOMEM_API_URL | AutoMem HTTP API endpoint (for existing/other) |
--api-key | AUTOMEM_API_KEY | Bearer token for authenticated endpoints |
--clients | AUTOMEM_CLIENTS | Agents to wire after deploy: codex,claude-code,cursor,openclaw,hermes |
--no-agent-install | AUTOMEM_NO_AGENT_INSTALL=1 | Provision the endpoint only; skip agents |
--yes / -y | AUTOMEM_YES=1 | Apply the reviewed plan without prompting |
--dry-run | AUTOMEM_DRY_RUN=1 | Print the plan, write nothing |
Verify
Section titled “Verify”Confirm the hosted backend is healthy:
curl https://your-automem-url/health \ -H "Authorization: Bearer YOUR_AUTOMEM_API_TOKEN"{ "status": "healthy", "falkordb": "connected", "qdrant": "connected", "memory_count": 0, "enrichment": { "status": "running", "queue_depth": 0 }}If Qdrant is unavailable, health reports "qdrant": "disconnected" and the top-level "status": "degraded". See Quick Start → Verify it worked for the full field reference and a first end-to-end memory test.
Troubleshooting
Section titled “Troubleshooting”| Symptom | Likely cause | Fix |
|---|---|---|
| Railway guided setup does not complete | The CLI flow could not finish in this environment | Choose Other and paste the endpoint + key for an existing AutoMem deployment |
401 Unauthorized on /health | Wrong/missing token | Re-check the key the provider issued; provide it without a Bearer prefix |
| You already run AutoMem on Railway | Railway (guided) creates a fresh deployment in this release | Choose Other and paste the existing endpoint + key |
Next steps
Section titled “Next steps”- Connect more agents — Platform Installers and the Platform Guides.
- Deep deployment docs — InstaPods and Railway.
- Production hardening — Backup & Recovery and Health Monitoring.
Release scope
Section titled “Release scope”The installer behavior on this page is validated against mcp-automem 0.16.0. The health-response vocabulary is validated against AutoMem 0.16.2.